How to Implement Feature Flags in .net
Hello! In this tutorial we’ll show you how to add feature flags to your .NET app, using Unleash and the official Unleash .NET SDK. With Unleash, an open-source feature management service, you can use our tooling to add feature flags to your application and release new features faster.
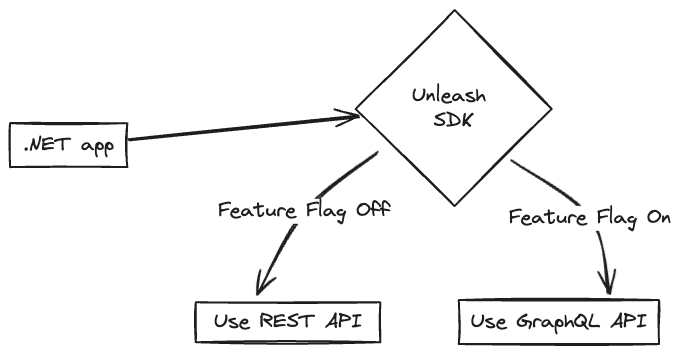
We’ll keep with the sci-fi theme of our previous tutorials and use the Rick and Morty API, with a .NET web API project. We’ll use feature flags to decide whether to call the REST or the GraphQL version of the API.
- Prerequisites
- 1. Install a local feature flag provider
- 2. Grab a list of characters from the Rick and Morty API
- 4. Add the GraphQL endpoint
- 5. Add Unleash to your .NET app
- 6. Verify the toggle experience
- Conclusion
Prerequisites
For this tutorial, you’ll need the following:
- .NET
- Git
- Docker and Docker Compose
The Unleash Server is a Feature Flag Control Service, which manages your feature flags and lets you retrieve flag data. Unleash has a UI for creating and managing projects and feature flags. There are also API commands available to perform the same actions straight from your CLI or app.
1. Install a local feature flag provider
In this section, we’ll install Unleash, run the instance locally, log in, and create a feature flag. If you prefer, you can use other tools instead of Unleash, but you’ll need to follow the instructions elsewhere. The basic steps will probably be the same.
Use Git to clone the Unleash repository and Docker to build and run it. Open a terminal window and run the following commands:
git clone https://github.com/unleash/unleash.git
cd unleash
docker compose up -d
You will now have Unleash installed onto your machine and running in the background. You can access this instance in your web browser at http://localhost:4242.
Log in to the platform using these credentials:
Username: admin
Password: unleash4all
Click the ‘New feature toggle’ button to create a new feature flag.
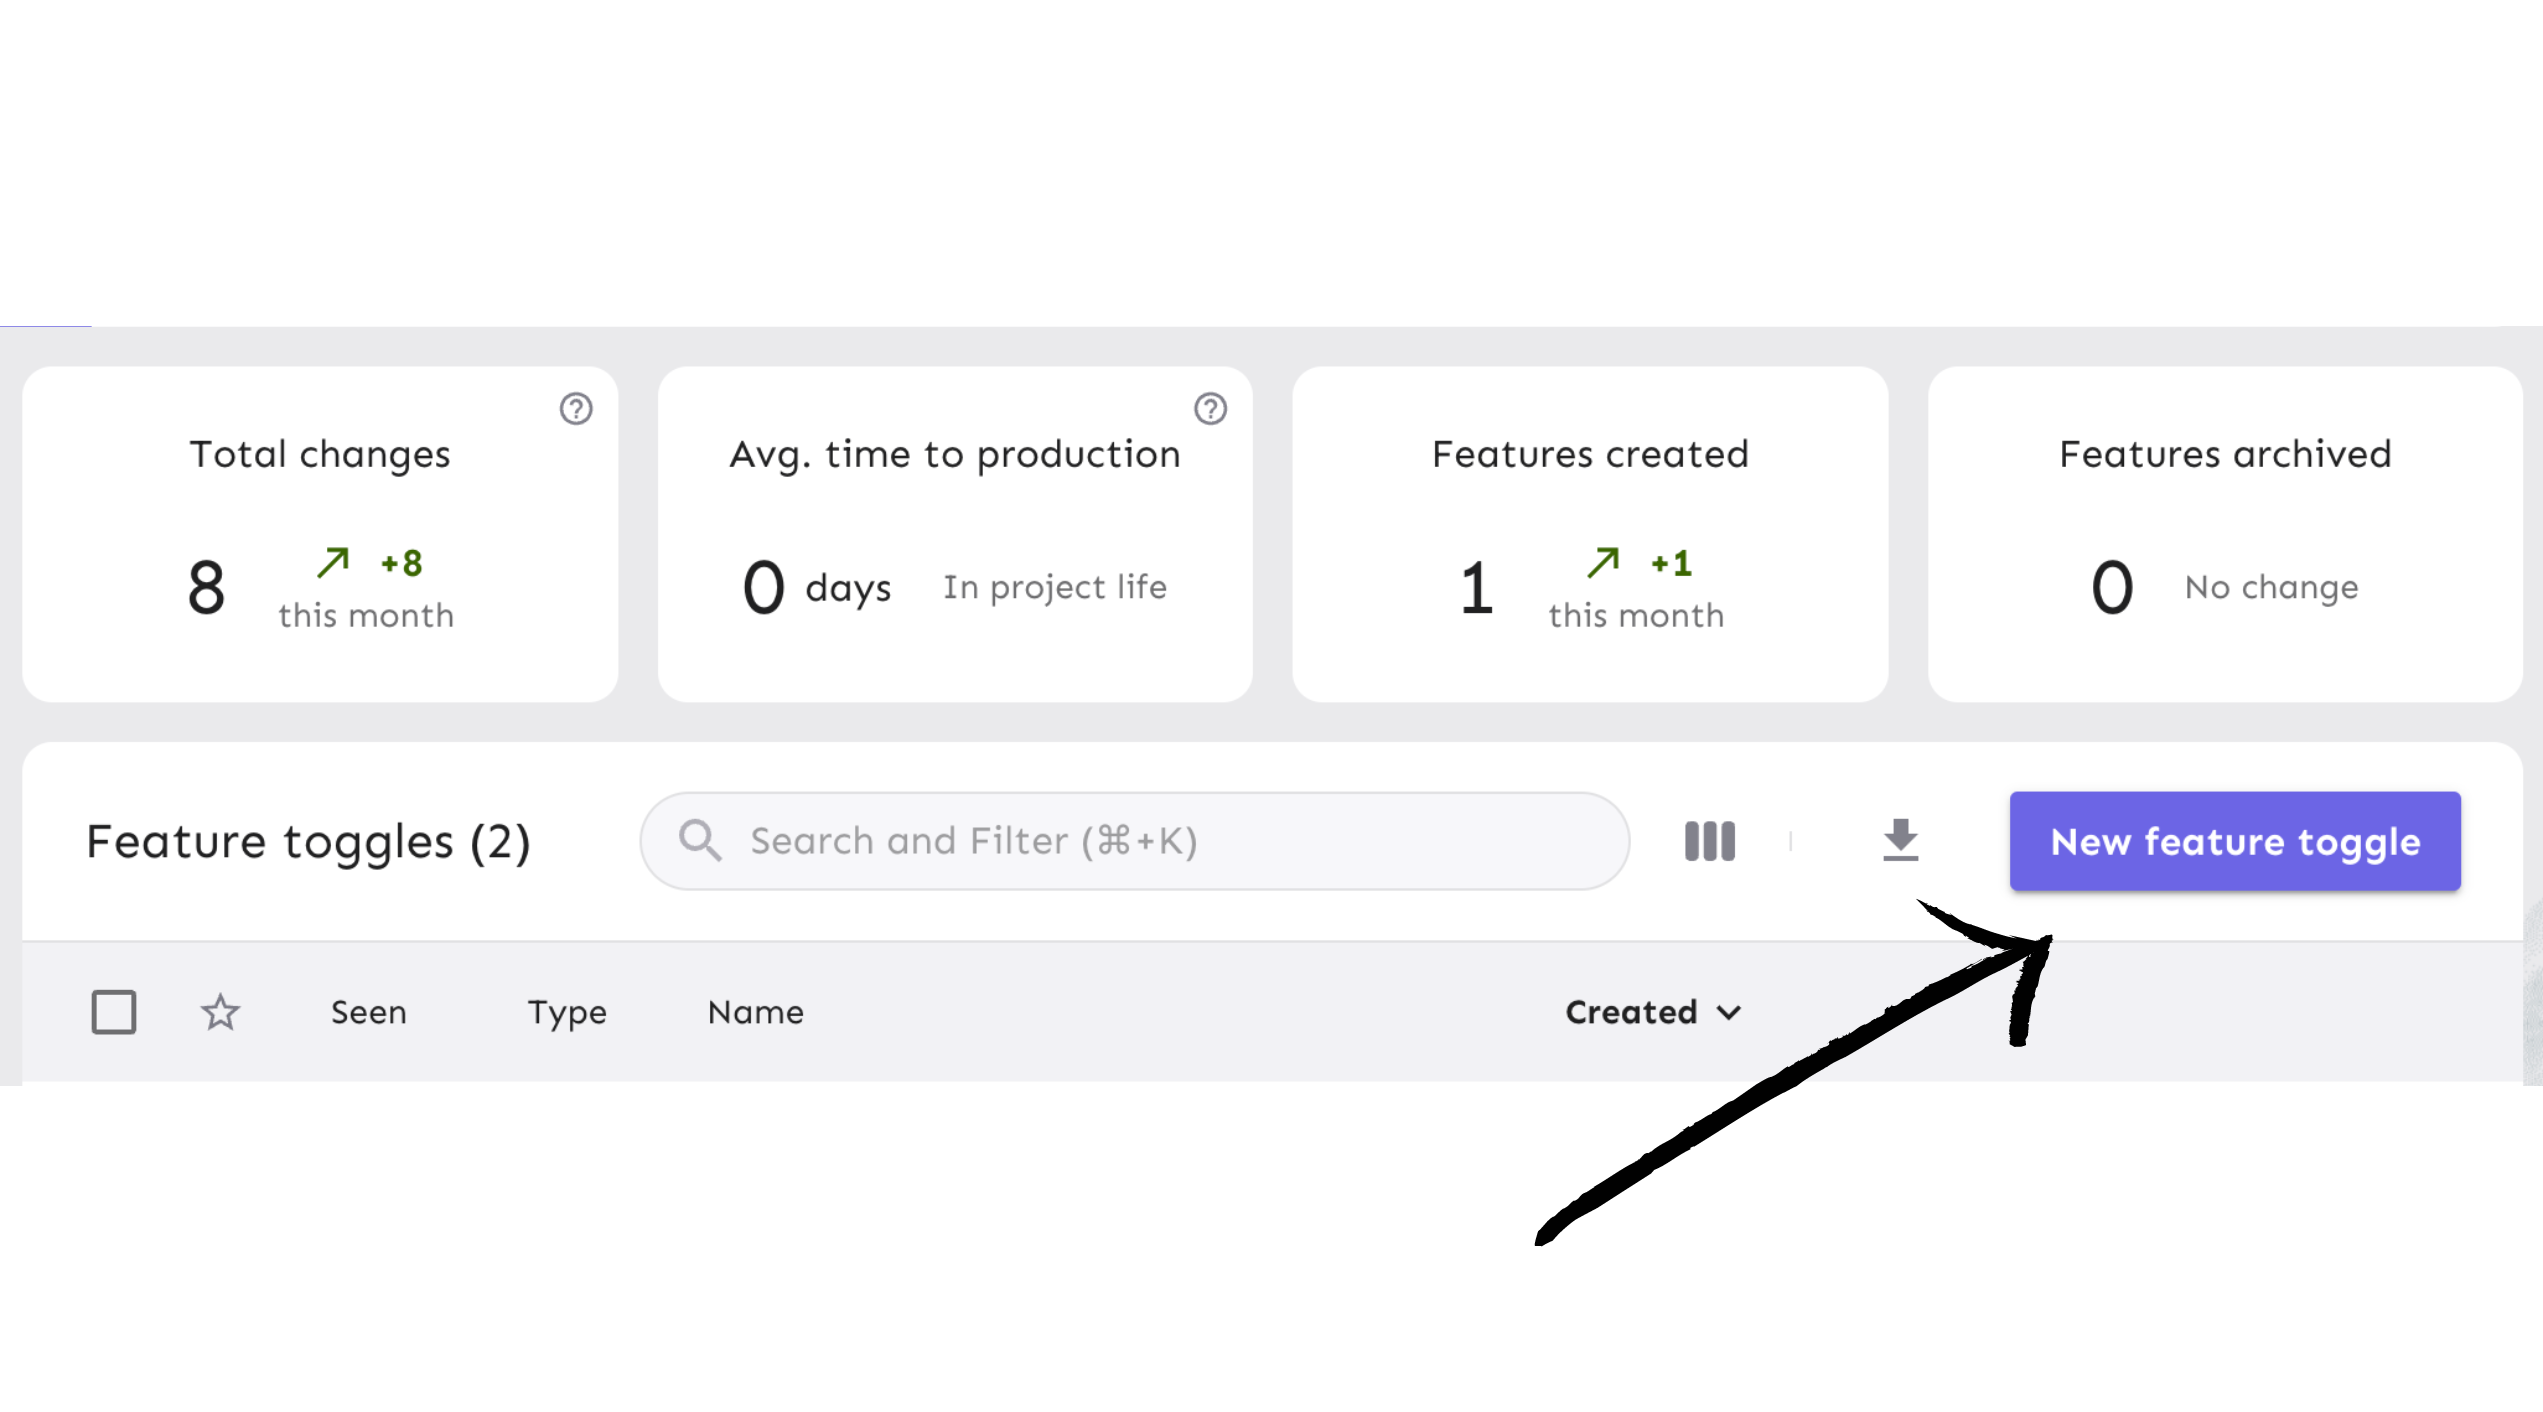
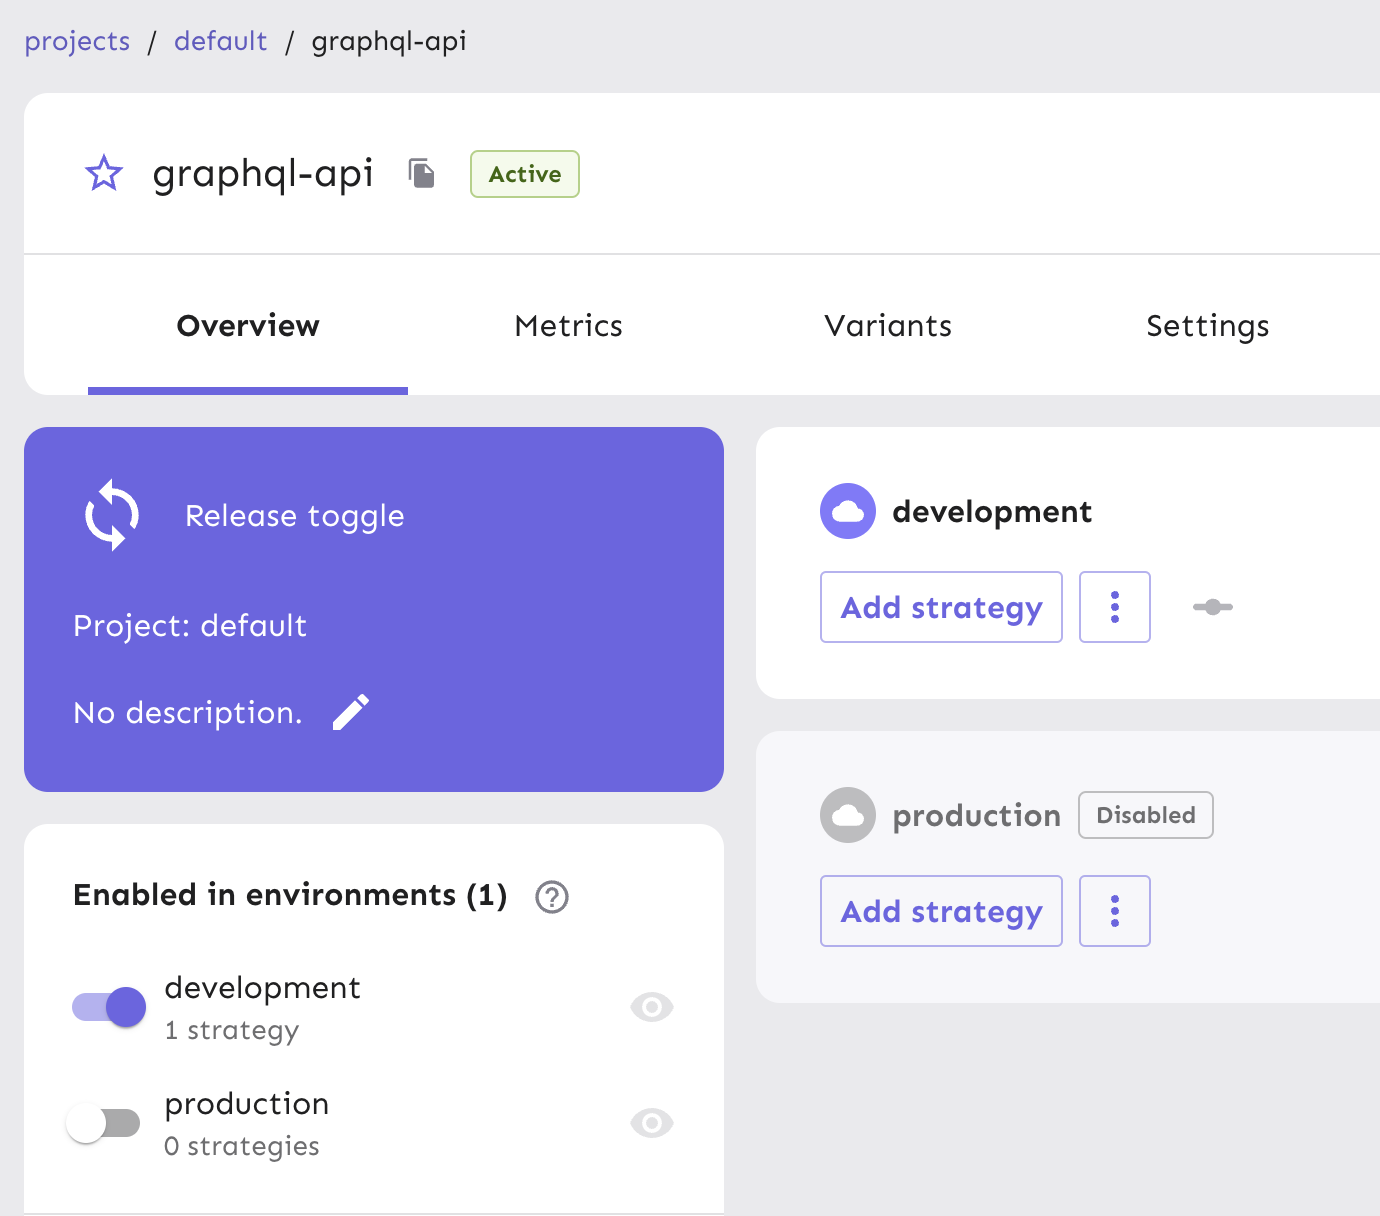
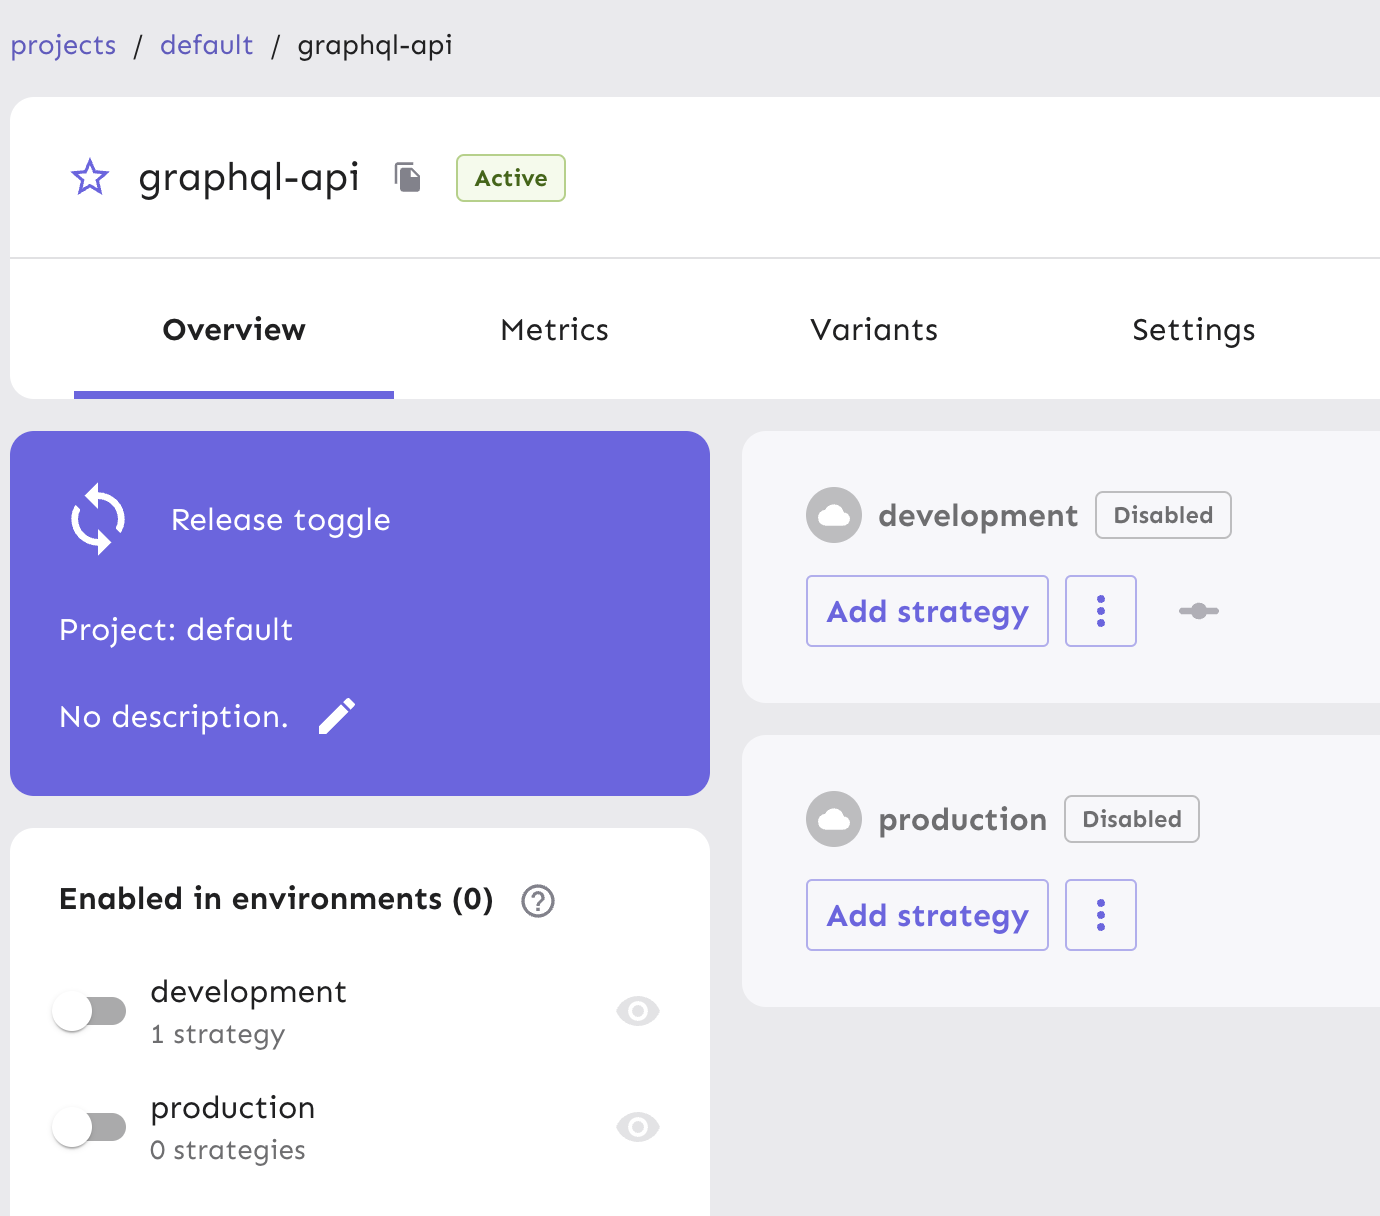
Call it graphql-api and enable it in the development environment.
Next, generate an API token to authenticate calls made to Unleash servers from your project.
Note We require an API token as part of your flag configuration to ensure that only applications with the correct authentication can access your feature flags in Unleash. API tokens are created by users with API management access and thus controls how they can be distributed to applications that need it, and by whom.
From your project view on the platform, go to "Project Settings" and then "API Access".
Select the ‘New API token’ button.
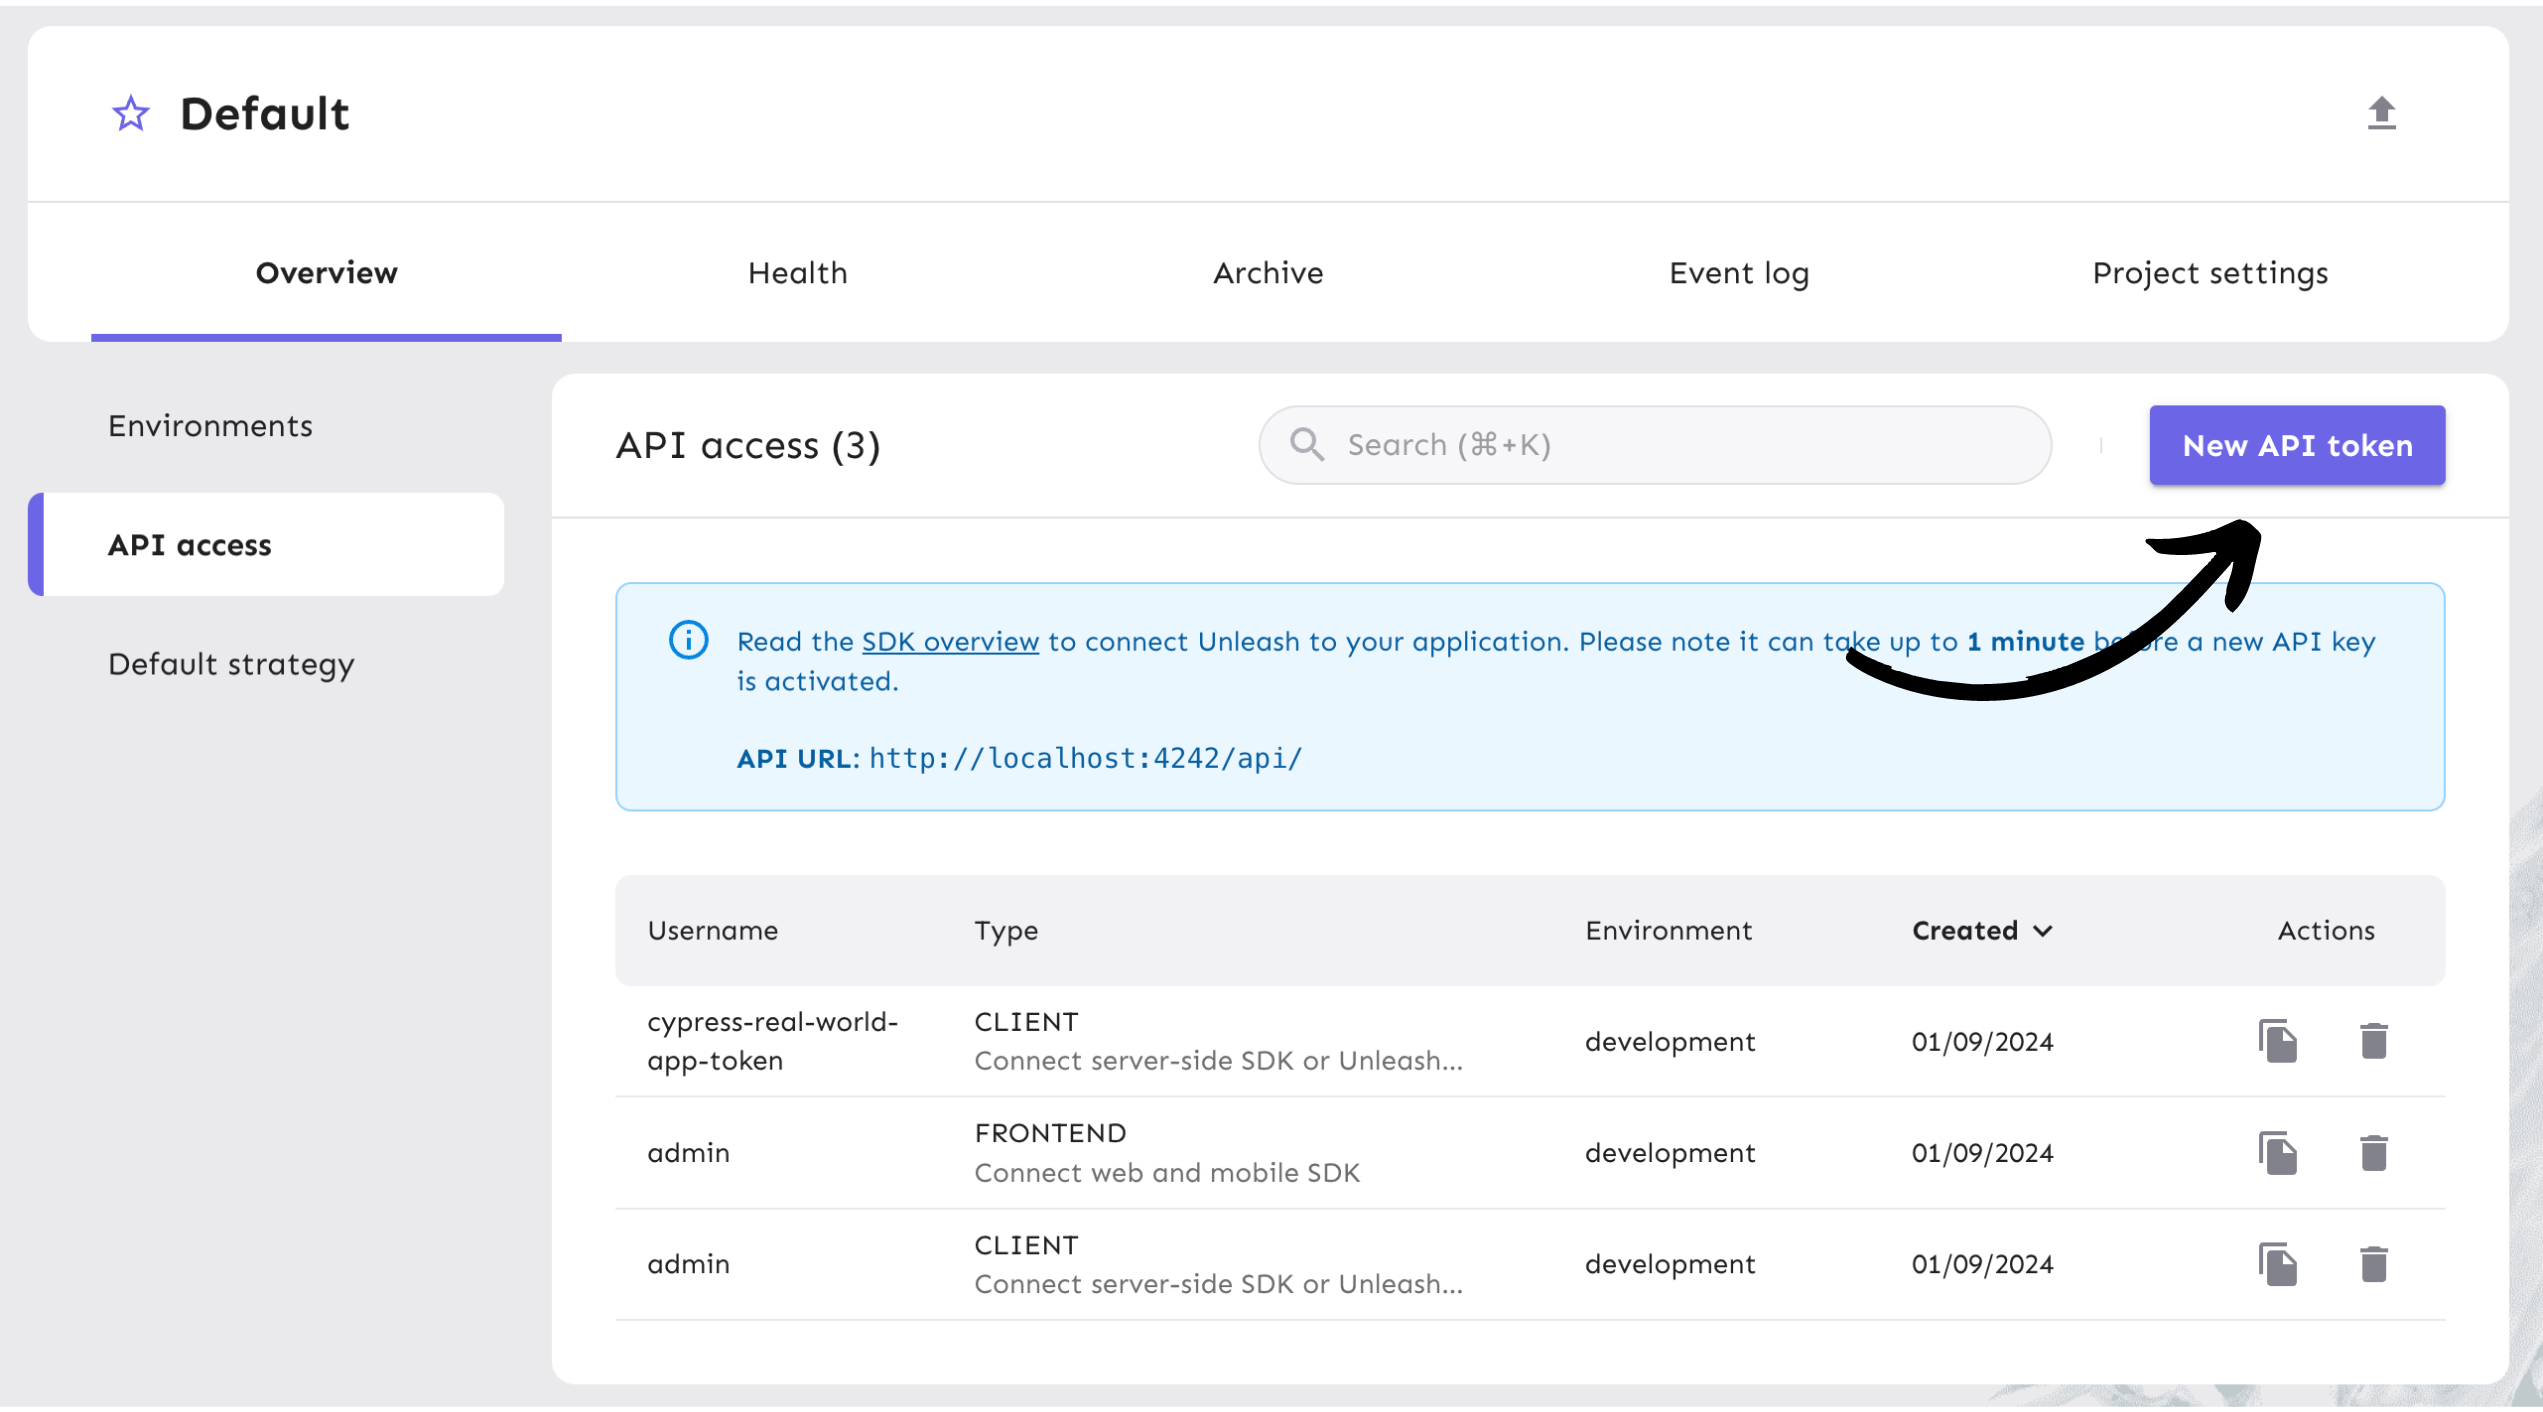
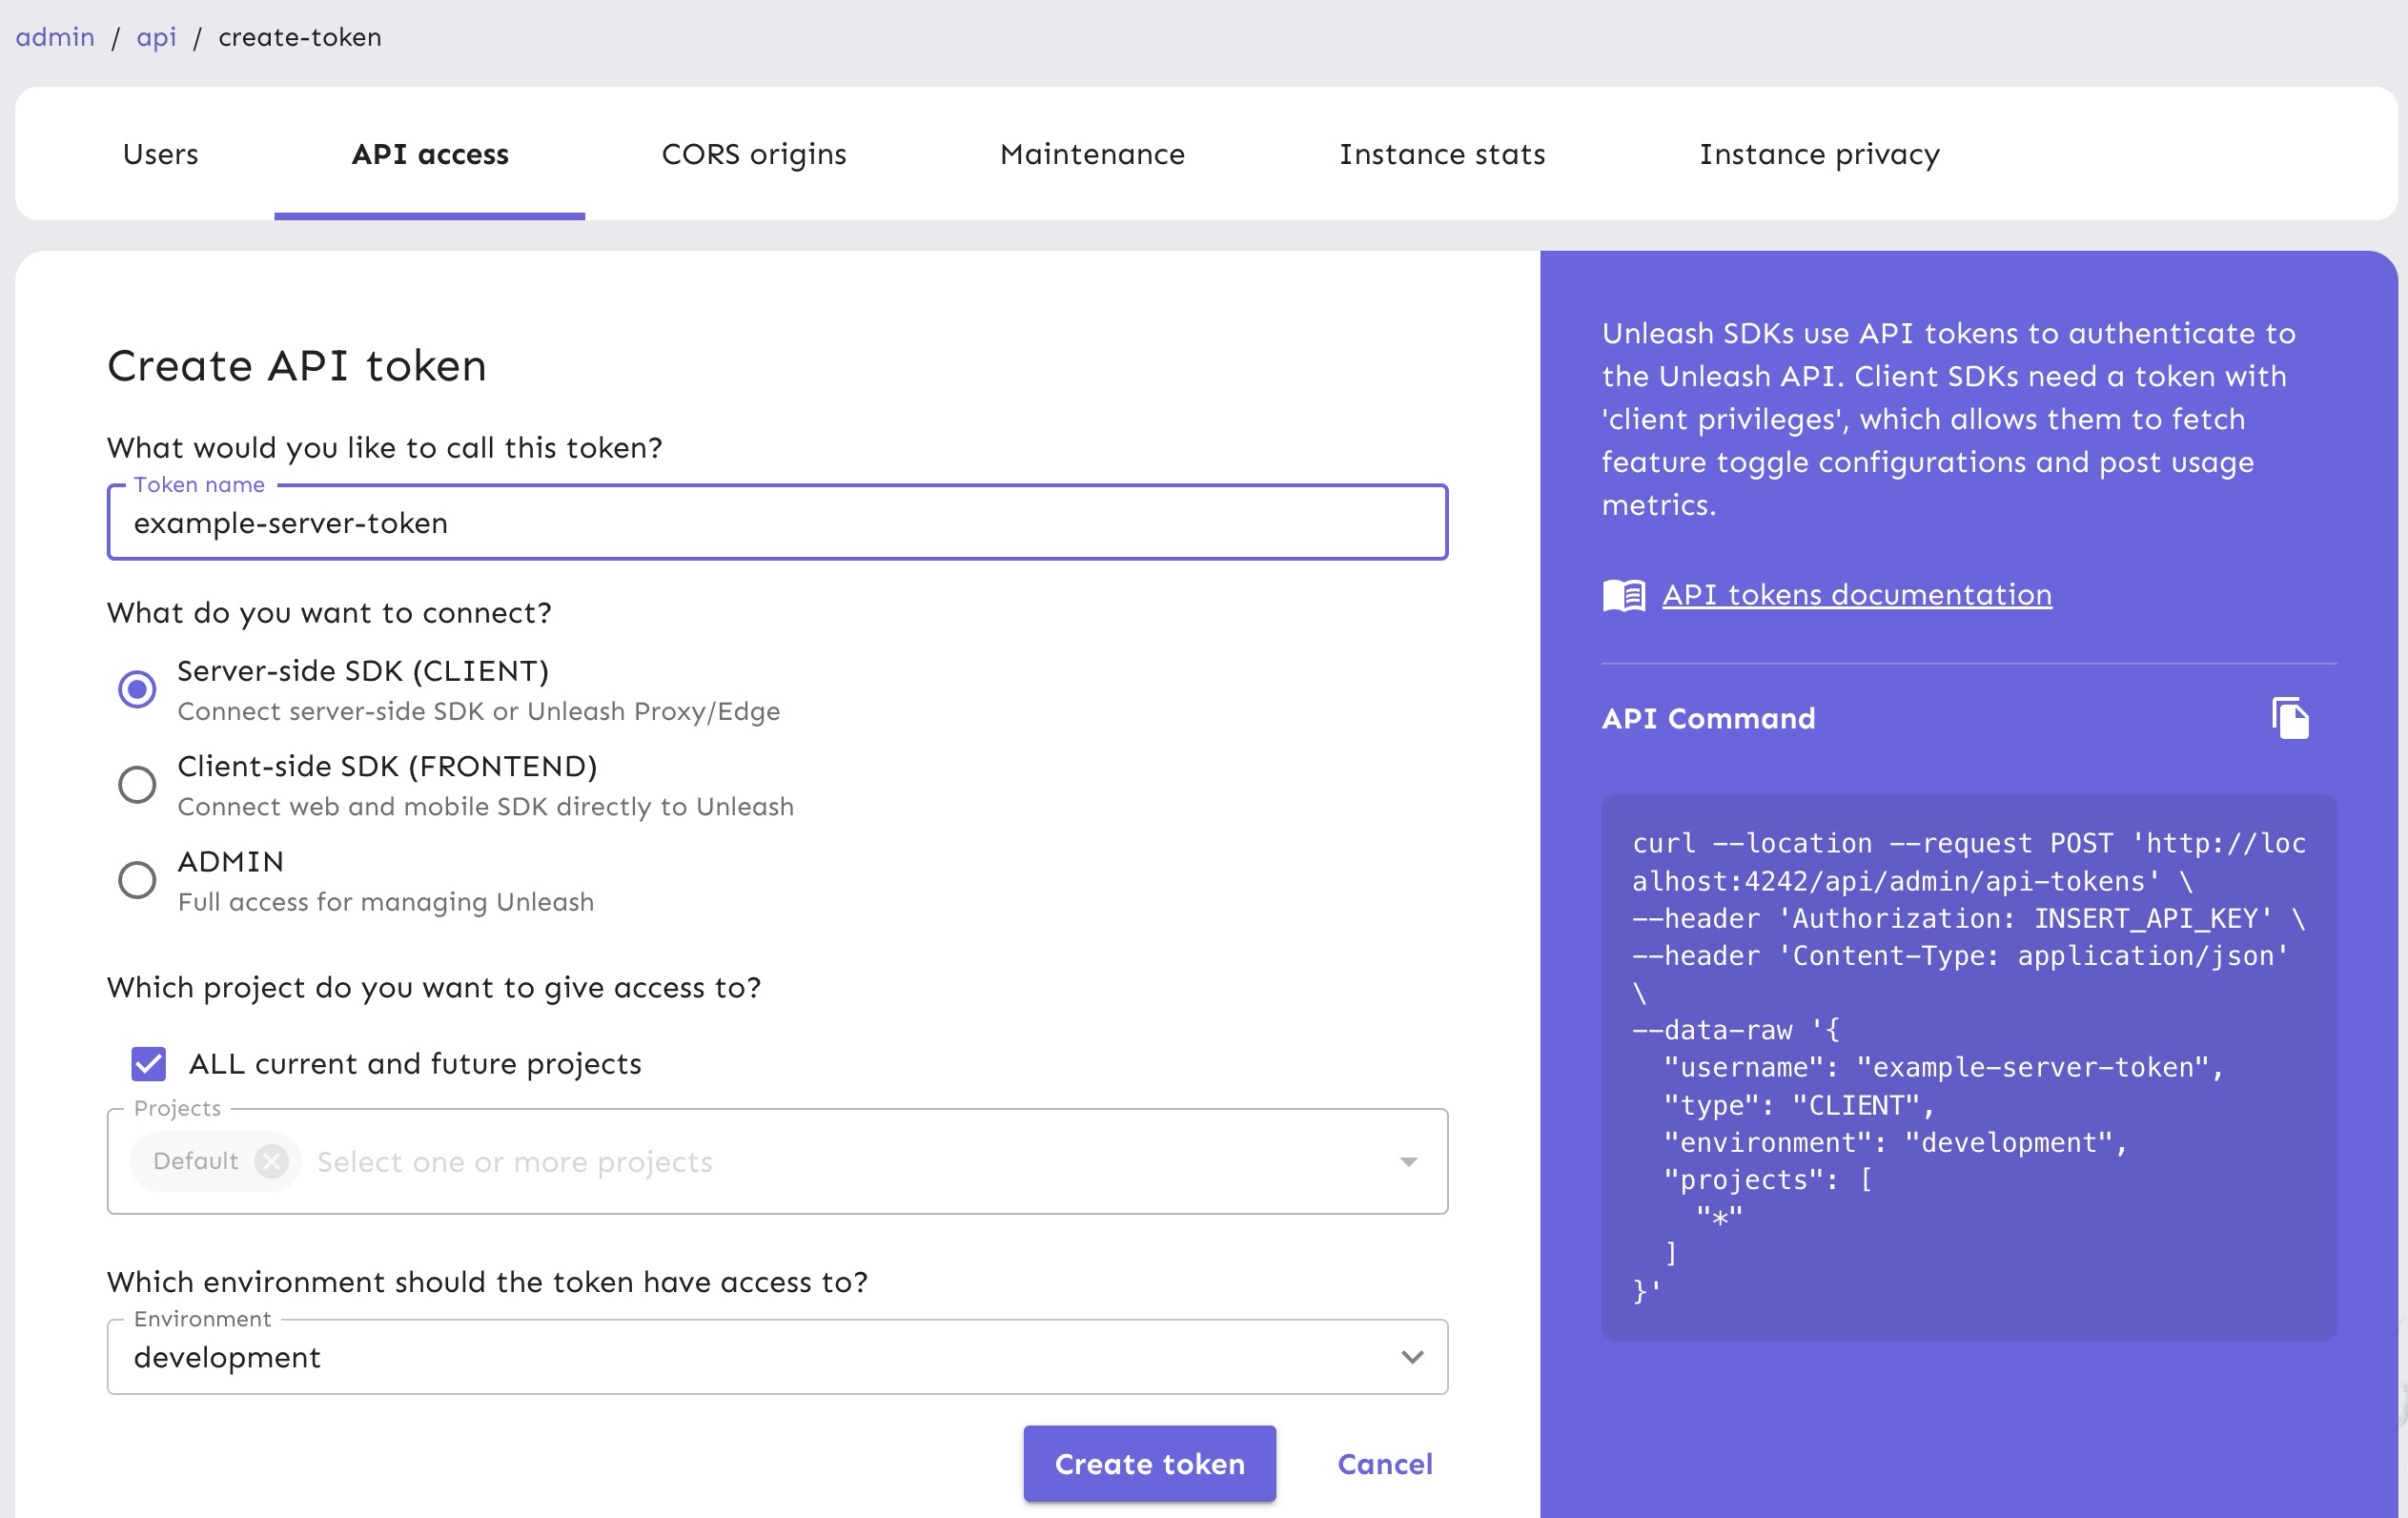
Name the API token and select the “Server-side SDK (Client)” token type. You can read more about Unleash API tokens in our documentation.
 .
.
After that, the token should have access to the “development” environment, as shown in the platform screenshot below.
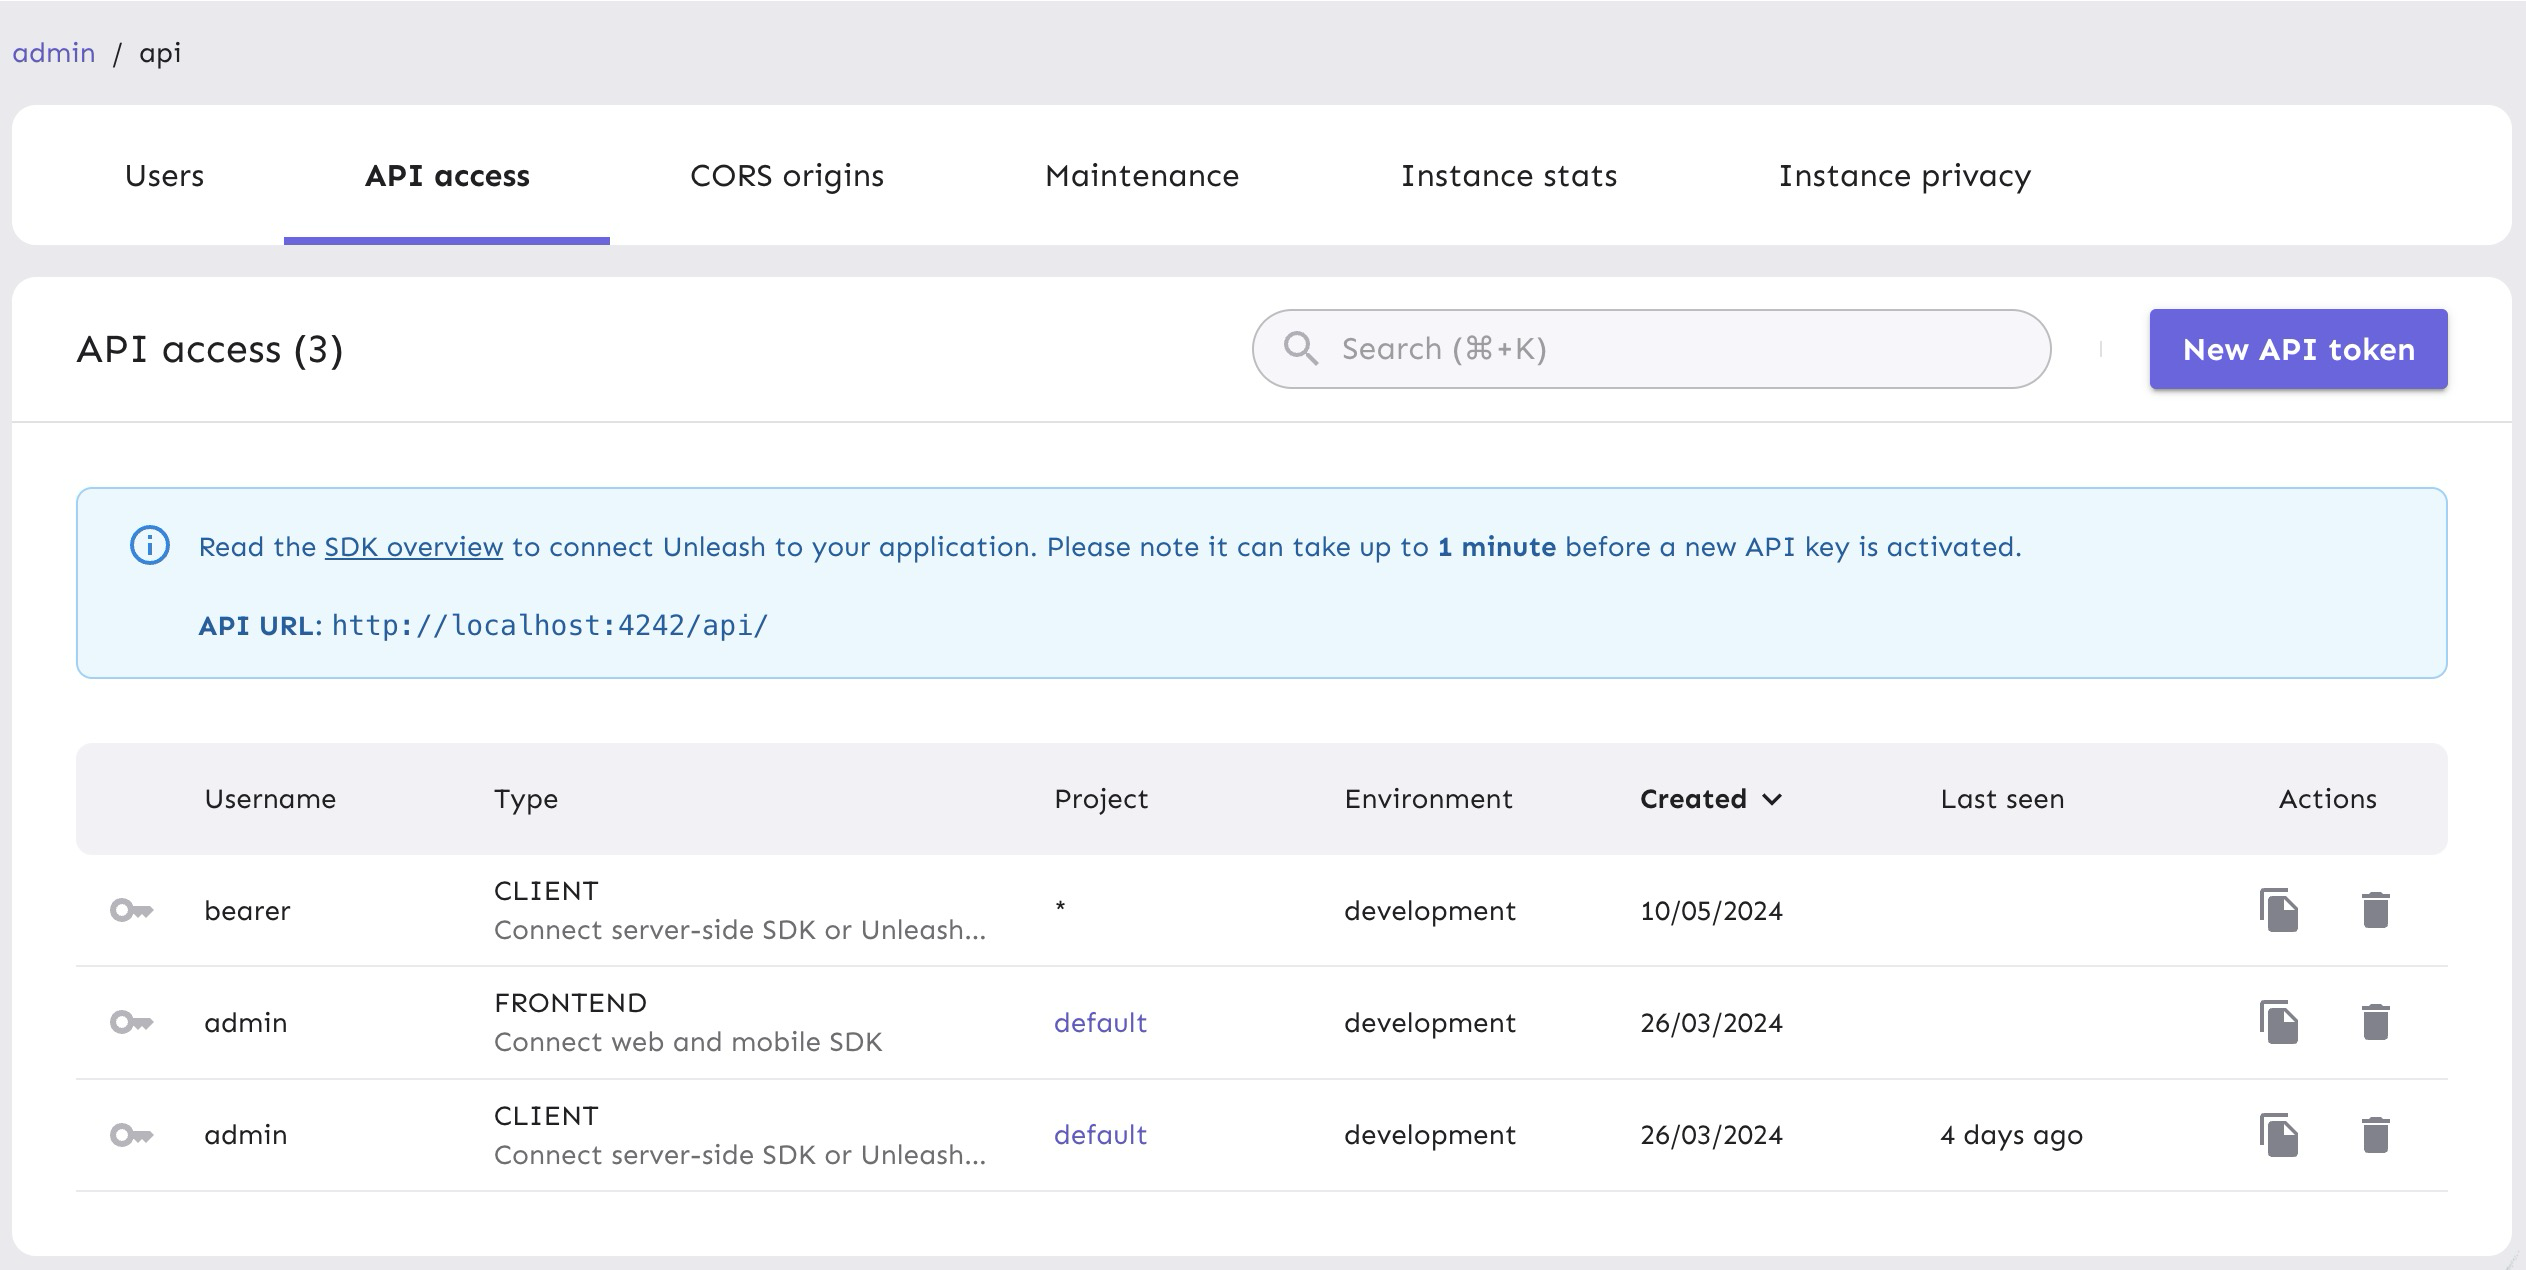
The API token you generated can be managed in the API Access view in your project settings. It will come in handy later.
Everything’s now setup on the Unleash side. Let’s go to the code.
2. Grab a list of characters from the Rick and Morty API
Open a new tab in your terminal, and create a new .NET project (NOT in the unleash folder).
dotnet new webapi -o dotnet-tutorial
We've created a new project with the web-api template, which uses ASP.NET core. We'll keep it simple without adding extra complexity like MVCs, custom middleware, or targeting specific users.
Then, let’s make sure our setup is working. Let’s make a call to the REST API to retrieve all the characters in the show.
This is our Program.cs
using System.Net.Http.Json;

var builder = WebApplication.CreateBuilder(args);

// Add services to the container.
builder.Services.AddHttpClient(); // Register HttpClient
builder.Services.AddEndpointsApiExplorer();
builder.Services.AddSwaggerGen();

var app = builder.Build();

// Configure the HTTP request pipeline.
if (app.Environment.IsDevelopment())
{
    app.UseSwagger();
    app.UseSwaggerUI();
}

app.UseHttpsRedirection();

app.MapGet("/", async (HttpClient httpClient) =>
{
    var response = await httpClient.GetFromJsonAsync<RickAndMortyApiResponse>("https://rickandmortyapi.com/api/character/");
    var characters = response?.Results;
    Console.WriteLine("Hello REST API");
    Console.WriteLine($"There are {characters?.Length} characters");
    return characters;
});

app.Run();

public record RickAndMortyApiResponse(Character[]? Results);
public record RickAndMortyGraphQLResponse(Data? Data);
public record Data(Characters? Characters);
public record Characters(Character[]? Results);
public record Character
{
    public string? Name { get; init; }
}
Run the code:
dotnet run
or, start your application with the watcher to make your project automatically reload on file changes.
dotnet watch --hotreload run
You should see There are 20 characters in your terminal.
4. Add the GraphQL endpoint
The point of this tutorial is to mimic a real-world scenario where you would migrate from a REST API to GraphQL and rely on a boolean feature flag to toggle between the versions. There will be no change in functionality between the API versions.
So far, we only used REST. Now, let’s add the GraphQL version. The GraphQL endpoint is https://rickandmortyapi.com/graphql.
Let’s create a static feature flag, for now, just to test that we can call both versions successfully.
app.MapGet("/", async (HttpClient httpClient) =>
{
        bool isGraphql = true; // Change to true to use GraphQL

        if (isGraphql)
        {
            var query = new {
                query = @"
                {
                    characters {
                        results {
                            name
                        }
                    }
                }
                "
            };

            var response = await httpClient.PostAsJsonAsync("https://rickandmortyapi.com/graphql", query);
            var result = await response.Content.ReadFromJsonAsync<RickAndMortyGraphQLResponse>();
            var characters = result?.Data?.Characters?.Results;

            Console.WriteLine("Hello GraphQL");
            Console.WriteLine($"There are {characters?.Length} characters");
            return characters;
        }
        else
        {
            var response = await httpClient.GetFromJsonAsync<RickAndMortyApiResponse>("https://rickandmortyapi.com/api/character/");
            var characters = response?.Results;

            Console.WriteLine("Hello REST API");
            Console.WriteLine($"There are {characters?.Length} characters");
            return characters;
        }


});

app.Run();
Run the code again:
dotnet run
You should see Hello GraphQL, followed by There are 20 characters in your terminal.
Feel free to change the isGraphql variable to try it out.
5. Add Unleash to your .NET app
Now, let’s connect our project to Unleash so that you can toggle that feature flag at runtime. If you wanted to, you could also do a gradual rollout, use it for A/B testing, etc.
You’ll need 3 things:
- The Unleash SDK installed
- The URL of your Unleash instance’s API. It’s
[http://localhost:4242/api/](http://localhost:4242/api/)for your local version. You’ll want to replace it with your remote instance. - The API token we created on our Unleash instance, feel free to create another one if you can’t find it.
Install the Unleash SDK by running:
dotnet add package unleash.client
and install its dependency
dotnet add package Newtonsoft.Json
With these , you can add your Unleash client by adding it as a singleton before the end of the code block where you initialize your services. Don't forget the using Unleash namespace.
using Unleash;

var builder = WebApplication.CreateBuilder(args);

var settings = new UnleashSettings()
{
    AppName = "dotnet-tutorial",
    UnleashApi = new Uri("http://localhost:4242/api/"),
    CustomHttpHeaders = new Dictionary<string, string>()
    {
        {"Authorization","default:development.unleash-insecure-api-token" }
    }
};

var unleash = new DefaultUnleash(settings);
builder.Services.AddSingleton<IUnleash>(c => unleash);
// the other services don't change

// Add services to the container.
builder.Services.AddHttpClient(); // Register HttpClient
builder.Services.AddEndpointsApiExplorer();
builder.Services.AddSwaggerGen();
You can check our API token and client keys documentation for more specifics.
Now, let’s add our client to our project, grab the feature flag from Unleash, and update our conditional statement. Don't forget to also update the config with your API key.
+app.MapGet("/", async (HttpClient httpClient, IUnleash unleash) =>
+{
+        bool isGraphql = unleash.IsEnabled("graphql-api"); // Change to true to use GraphQL
-app.MapGet("/", async (HttpClient httpClient) =>
-{
-        bool isGraphql = true; // Change to true to use GraphQL
  // ... rest of the code
See additional use cases in our .NET SDK documentation.
6. Verify the toggle experience
Now that we’ve connected our project to Unleash and grabbed our feature flag, we can verify that if you disable that flag in your development environment, you stop seeing the Hello GraphQL message.
Note: An update to a feature flag may take 30 seconds to propagate.
Conclusion
All done! Now you know how to add feature flags with Unleash in .NET. You’ve learned how to:
- Toggle between a REST and a GraphQL endpoint based on a feature flag
- Install Unleash and create/enable a feature flag
- Initialise the Unleash client as part of your web api's services
- Grab the value of a feature flag with the .NET SDK
Thank you